Friday, September 25, 2009

Mason BB Pinblock Located


After the pinblock is fit to the plate, it must be located in the body of the piano to the proper location and height. I prefer to have my blocks fit tight on the sides and the front to the stretcher. This requires careful indexing and some trial and error. The plate must be returned to it's proper height and location side to side and back to back. Also the pinblock must lay flat on the shelf where it is mounted. When all these requirements are met, the block is dry fit with screws for the next step of setting the bearing.

Wednesday, September 23, 2009

Two Pinblocks Fit To Plate


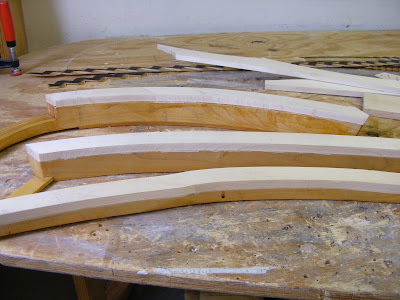
Two pinblocks in one day isn't a bad days work! I spend more time fitting the block to the plate than most. I feel it is important to have a good fit not only on the flange, but also to the web of the plate. I fit the block to the web much like I fit the block to the flange. The web area is masked, and paint is applied to the web and the flange. A power sander is used to remove the high spots (dark areas) until the desired fit is achieved. I finish the flange fit with automotive polyester body filler for a perfect flange fit.

Monday, September 21, 2009

Bridge Cap Glue Up


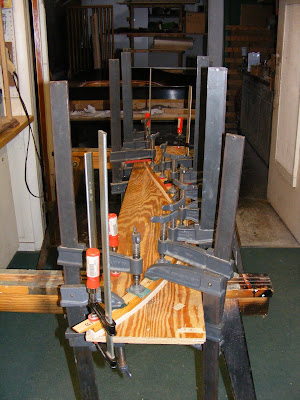
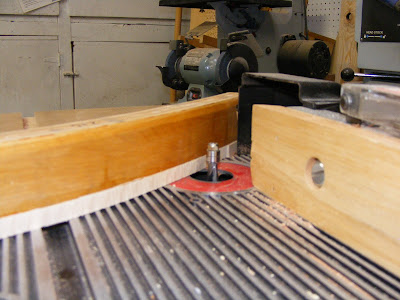
One half inch thick quarter sawn hard rock maple is the material used for bridge caps. Because the cap and the bridge body are made from a very hard wood, it is very important that the joining surfaces mate perfectly. I use a combination of thickness planer, joiner, sanding block and scraper to achieve this perfect mating. It is a bit tedious, but it is possible. Once this is accomplished, the cap and body are joined with a special glue (Bolduc acoustic wood glue) and clamped with about 200 psi pressure. After drying overnight, the over hanging wood stock is removed with a spiral trimming router bit in my router table. The result is a tight joint, and nicely planed side, and a bridge that is ready to be planed to the proper height when setting the bearing.

Wednesday, September 16, 2009

Bridge Work


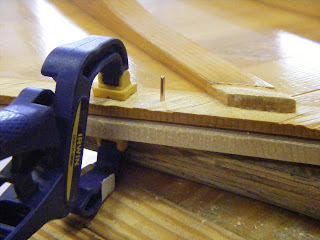
Today was bridge work day. No, I wasn't at the dentist. I was beginning the process of installing new caps to two piano's bridges. The old bridge pins have been removed, and a pattern is made to recreate the old bridge pin lay out after the new cap is glued to the bridge body. Thin Lexan is used as a pattern material. It is placed on top of the old bridge cap and indexing holes are drilled through the Lexan and through the bridge cap and bridge body. The blank patterns are attached to the old bridges with bridge pins. An awl is then used to mark the locations on all the empty bridge pin holes. The patterns are completed by drilling a hole through the pattern at every bridge pin location. After the patterns are completed, and the thickness of the original bridges are recorded, the old caps are removed with the bandsaw. The old bridge pin holes are plugged with small dowels and glue. After the glue has sufficient time to dry, the bridge body will be planed to receive the new caps.

Mason & Hamlin BB Board Pressed


In less than a week I have pressed two sound boards, the latest being the Mason and Hamlin BB. Above is a pic of the old beside the new. At this time i have three pressed boards in my hot box. It seems things come in waves. The second pic is inside my hot box.

Friday, September 11, 2009

Baldwin F Soundboard Pressed


Today the Baldwin F board was pressed. The panel had been maintained at 5.0 % EMC for several weeks now, and all the prep work was completed. The ribs were glues with Bolduc supplied glue, at 100 PSI. It was in the press for 6 hours. Now back into the hot box. It will remain there through all the bridge work and final fitting. Only after the board is glued into the piano will be allowed to return to normal atmospheric conditions.

Wednesday, September 9, 2009

Baldwin F Ribs Indexed


After the ribs are properly fit to the rim reliefs, and the new soundboard panel is fit to the rim, I am ready to index the ribs to the new panel. A hole is drilled through all the rib tips into the rim. Following that, a #7 bridge pin is installed in all the ribs and the 3 original indexing holes drilled before the old board was removed. The fit new panel is then placed on top, and the protruding bridge pins are press into the panel, leaving indentations. Using these indentations, the old board is laid on top of the new panel, and aligned to the 3 indexing pins. All the holes are transferred from the old board to the new panel. The indexed new ribs are then placed on the new panel, and traced. These holes will be used to locate the ribs when the board is pressed.

Friday, September 4, 2009

Mason & Hamlin BB Rib Work


The Mason's original ribbing seemed a bit to heavy to my taste, especially in the treble. The reliefs were shorter than most pianos, and the tail thickness thicker. Before removing the strings, I noted that the piano had excessive down bearing over most of the board. This tells me that the board was overly stiff. I disagree with the concept that if a little bearing is good, a lot is better. Too muck down bearing on an over stiff board equals limited freedom of movement, thus limiting the sound. Others would argue that excessive bearing creates a bigger sound. That doesn't compute in my overall philosophy as to what makes a great sounding board. I believe a board needs to be in a state of equilibrium- meaning that down bearing and crown, as they oppose each other, are about equal and therefore the board is very free to vibrate. If one force overbears the other, the board is not in a state of equilibrium, and the sound will be diminished. Pictured is the rib work in process.

Wednesday, September 2, 2009

Bridge Bottoms Cleaned


When removing bridges that are glued to the soundboard, a fair amount of soundboard wood and glue residue are left on the bridges. The wood reside is carefully removed with a wood chisel. The goal is to remove the soundboard wood, but not nick the bridge bottom. Then the surface is soaked with a solution of wall paper remover and water, and let stand for 10-15 minutes. A wood scraper is then used to remove the old glue residue, leaving a clean surface for future attachment to the new soundboard.

Tuesday, September 1, 2009

Mason & Hamlin BB Rim/Rib Notches


The original soundboard on this Mason had very short rib tails in the rim. I personally feel that a deeper rib tail makes for a better sounding board, so the notches in the rim were extended. This was accomplished with a few chisels and a little elbow grease!