Monday, December 14, 2009

M&H BB Damper Back Action Replacement


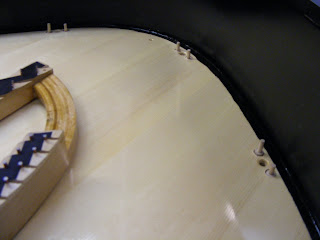
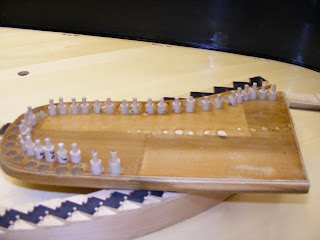
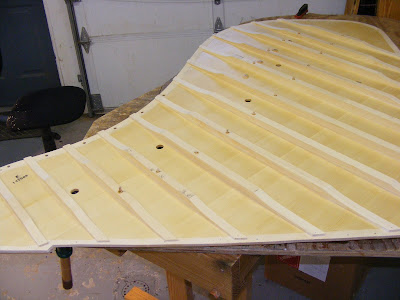
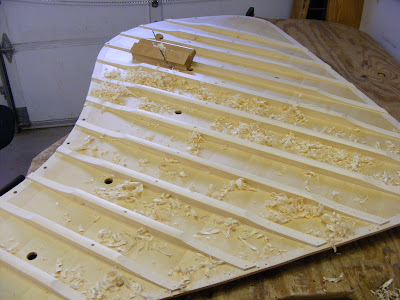
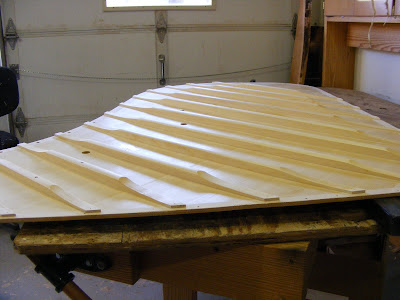
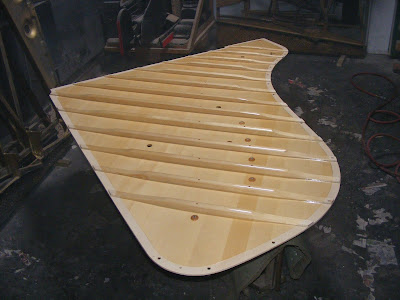
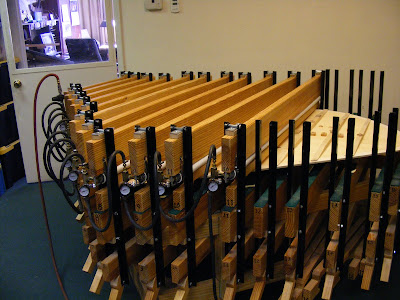
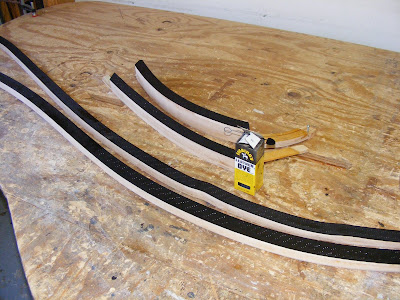
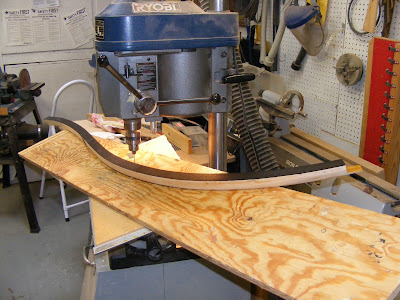
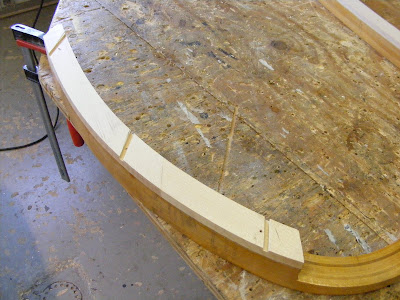
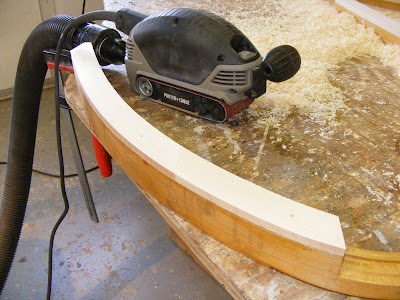
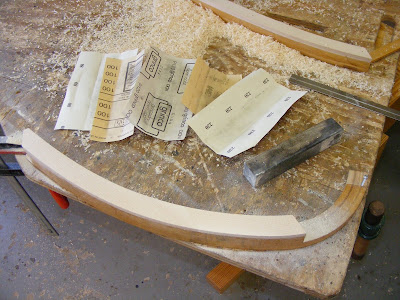
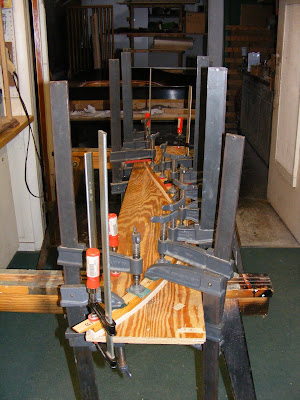
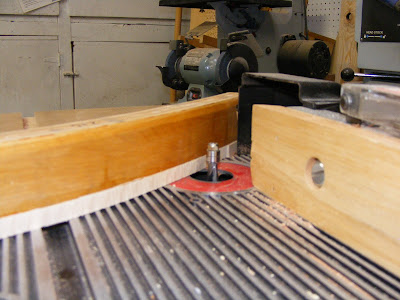
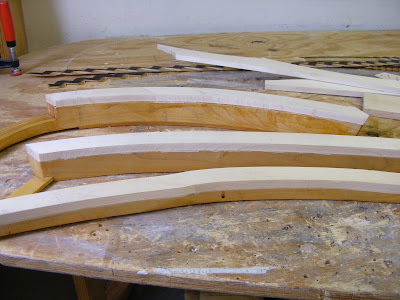
Damper work can be some of the most tedious work in piano rebuilding. Everything needs to be precisely positioned for proper operation. Ofter it is desirable to replace the damper back action as part of obtaining proper damper performance. On the Mason, the original back action was kind of an odd-ball design that I have never seen before. Because of the odd design, and the age of the instrument, it was decided to install a replacement.

In this case, the design and dimensions of the replacement were totally different than the original, so it required a bit of planning to make the replacement. You can see the differences in the photos.
Thursday, December 10, 2009

Mason & Hamlin BB Pinblock Drilled


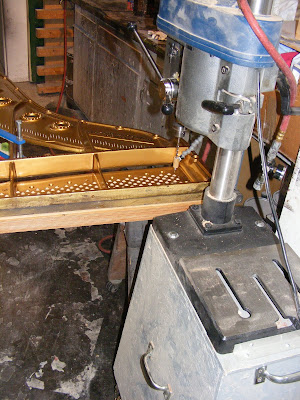
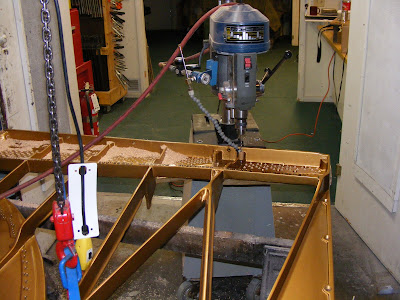
The Mason pinblock was drilled while installed on the plate. This is because the Mason has tuning pin bushings. Actually, this is the way I formerly drilled my pinblocks. If the piano didn't have tuning pin bushings, I installed them.

To accomplish this, the plate is set up outside the piano. I aim for a 3 degree angle on the pin, so the rear of the plate is set lower than the front. My drill press head can be rotated 180 degrees to the rear. My drill press is mounted on a cart with large wheels, and the base is filled with ballast to make it secure when moving.

Drilling through the tuning pin bushings speeds the process if stringing by allowing the stringer to push the pins into the plate, and be held there. Also, there is no chance of the tuning pins holes being miss-aligned. The pictures show the set up.

Wednesday, December 9, 2009

New Apprentice


For his sixth birthday, Benjamin's grandpa (me!) bought him a children's tool kit. Benjamin told me it was his best present ever:). Here he is working on his first project- a wooded tractor.

Wednesday, December 2, 2009

Family Time


I haven't written much lately for two reasons. First, I have been busy tuning, and second, I have been busy with family. Several pictures tell it all.

Tuesday, November 17, 2009

Baldwin F Strung


Yesterday I completed the belly work on the Baldwin by installing the strings. Next, dampers have to be installed, and lots of action work.

Monday, November 16, 2009

Plate Suspenstion


Before the plate can be installed, the suspension dowels must be reinstalled. The Mason and Hamlin originally had one lag bolt per plate screw as suspension dowels. This is a rather undignified means of suspending the plate for a prestigious piano. So i changed to a standard two dowel per screw system.

I drill holes through the soundboard into the rim about 3/4" deep. These holes are roughly 1" on either side of the plate screw hole. I use a compressible indexing dowel to determine the length of the dowels to be installed. The indexing dowels are extended longer than the future dowel, and then the plate is installed on top. The weight of the plate compresses the indexing dowels to their proper height. The indexing dowels are then measured, and the permanent dowel length is matched. Glue is applied to the holes, the dowels are installed, and the plate is installed on top of the new dowels.

Thursday, November 12, 2009

Baldwin F Pinblock Drilled


I use my drill press for drilling most pinblocks. I built a cross sliding table that mounts to my drill press table. It moves both side to side and front to back. I use a chiller to keep the drill bit cool while drilling the very hard wood in the pinclock. The pinblock is marked when mounted to the plate to locate the pin hole locations.

If the plate has tuning bushings I drill the block through the plate. That's a discussion for another time

Monday, November 9, 2009

Soundboard Tops Finished


After the new board is glued into the piano, it is ready to be finished. The overhang at the front edge of the stretcher is planed flush and sanded. Also, any trim pieces must be reglued and soundboard decals applied. The the piano and bridges are masked, and lacquer is sprayed to complete the finish.

Tuesday, November 3, 2009

Soundboards Glued In Pianos


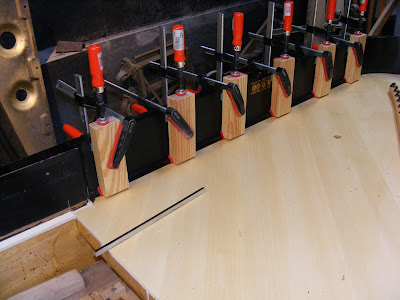
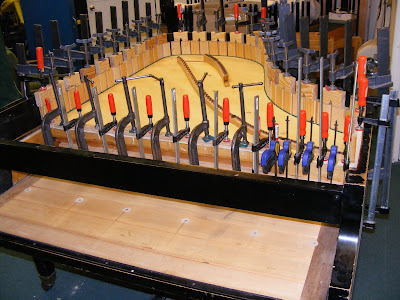
Both soundboards have been glued into the pianos. This is done after the bridges are attached and bottom side of the board is finished. This is accomplished with liquid hide glue and lots of clamps. After I complete this task, I nearly always sit down, and just reflect on all the work that has been done to get us to this place.

Wednesday, October 28, 2009

Board Bottoms Finished


After the bridges have been glued and doweled to the new board, the bottom side can be finished. The first operation is to cot the dowels flush with the rib top. Then a radius is cut on the top of the rib using a special hand plane. Following a lot of hand sanding, the edge gluing surfaces are masked and finish is applied. This completes the bottom side, and the board is ready to be installed in the piano. The top will be finished later.

Monday, October 26, 2009

Bridges Glued To Soundboard


My soundboard press serves two purposes. It is not only a soundboard press, but also a bridge press. Many rebuilders have a separate fixture for gluing bridges, but in my small shop, space is a major issue, so if I can use one fixture for two purposes, I am happy.

I use liquid hide glue for mounting the bridges. It has a long open time (15-20 minutes), and is easily reversible in case the bridge needs to be removed at a later date. I also think hide glue has a very good sound transmission quality, although that is hard to quantify.

A heavy coat of glue is applied to the bridge body only. The bridge is placed on the new board using the locater pins to position it. Several screws are used to hold the bridges in place, and then the board is turned upside down on the bench. Now I use temporary screws in the holes where dowels will later be installed, through the rib and into the bridge. Finally the board is placed on the press, and the area between the ribs are clamped in place with air pressure.

After the board has been in the press for 5-6 hours, the screws in the ribs are removed, and dowels are installed.

Tuesday, October 20, 2009

Bridges Drilled, Notched and Pinned


After the new caps are planed to the desired height, I reinstall the patterns made from the original caps, and mark every pin hole with a pencil mark. I then reinstall the dryfitted bridge and soundboard into the piano, and place the plate in place. This allows me to be sure that I am satisfied with my down bearing and to check the bridge pin locations.

With the bridge back on the bench, I make any adjustments to the pin locations that I feel necessary. A triple pinned punch is used to center punch the pin locations. When all of the holes have been located, I black and lubricate the bridge top. For drilling the pin hole, most technicians choose to do this operation by hand, as the hole must be drilled at a compound angle. I have devised a method of drilling on my drill press, which allows for a more controlled boring.

Notching is probably the most physical job of rebuilding. Chiseling notches in rock had maple take a lot of force. My shoulder still aches several days after completing this job. It is also a rather tedious job, as it is important to evenly split the bridge pin hole in half with the chisel as the trough is formed. Eighty eight notes, two sides to the bridge equals 196 notches.

The final operation is to install the new bridge pins. The pins are filed flat on top as the final step of the process. Now- get ready to permanently glue the bridges to the mew board.

Thursday, October 15, 2009

Planing Bridge Tops


After the notches are cut in the bridge tops to the height for proper bearing, the remaining wood must be planed and sanded. Since the board and bridges were dry fitted, I can remove them and do the final work on the bench. (Some rebuilders do all this after the bridges and board are glued into the piano. That requires you to be at some very awkward positions, which my body doesn't do any more!)

I start with a power planer. This requires a lot of care as the machine takes off a lot of material in a hurry. I follow that with a small power sander with 60 grit paper. Again care must be taken. It is very easy to end up with a rounded top, rather than the desired flat top on the bridge with this machine. I finally finish with hand sanding, doing 100, 120, 150 and finishing with 220 paper. Again, care must be taken to keep the bridge top flat. I check this with a straight edge while sanding.

When the sanding is completed, I use my indexing holes to locate the patterns that were made earlier, and mark with pencil all the pin locations. Then the bridge is again dry fitted to the board and piano, and the plate installed. Now I can check that I am satisfied with my bearing, and can also check the bridge pin locations.

Monday, October 12, 2009

Setting Bearing


I continue to work on two projects simultaneously, that being the Baldwin F and the Mason and Hamlin BB. Setting the bearing (determining how much down bearing will be exerted on the bridge surface)is one of the most demanding jobs, as you only get one chance to get it right (although there are ways to fudge it if you aren't satisfied with the final results). How much bearing is needed at various points on the bridge is determined by each rebuilders experience and theory as to what contributes to the tone quality desired. Every rebuilder has his own formula. A simplified explanation of the formula that I follow is that I determine to approximate the amount of downbearing to equal the amount of crown that is present in the soundboard directly below the area of the bridge where the bearing is being set.

The new bridge caps were installed at a thickness greater than necessary. The bearing is set by cutting notches in the cap to the desired finish height of the bridge cap, and then planing the wood surface to that height (thickness) determined by the notch.

To accomplish this, the bridges are dry fit to the soundboard and the soundboard is dry fit to the piano. The plate is then installed on the pinblock and set to it's predetermined height. A string is stretched between the agraffe or V bar and the bearing point on the plate at the rear of the bridge. The bearing on the bridge is determined by the amount of deflection on the string between the front and rear termination points.

Long Time, No Blog!

I'm sorry that I haven't added anything to the blog for a while. These have been very busy weeks partially because I have taken two long weekends in the interim. One weekend Rosanna and I attended a couples retreat at Roxbury Camp (staying in our cabin) and another weekend we were in Ocean City MD with some of Rosanna's college days friends. On top of that, I have been tuning pianos nearly every day, with little time in the shop. So, now I hope to be back on track with several posts a week.

Friday, September 25, 2009

Mason BB Pinblock Located


After the pinblock is fit to the plate, it must be located in the body of the piano to the proper location and height. I prefer to have my blocks fit tight on the sides and the front to the stretcher. This requires careful indexing and some trial and error. The plate must be returned to it's proper height and location side to side and back to back. Also the pinblock must lay flat on the shelf where it is mounted. When all these requirements are met, the block is dry fit with screws for the next step of setting the bearing.

Wednesday, September 23, 2009

Two Pinblocks Fit To Plate


Two pinblocks in one day isn't a bad days work! I spend more time fitting the block to the plate than most. I feel it is important to have a good fit not only on the flange, but also to the web of the plate. I fit the block to the web much like I fit the block to the flange. The web area is masked, and paint is applied to the web and the flange. A power sander is used to remove the high spots (dark areas) until the desired fit is achieved. I finish the flange fit with automotive polyester body filler for a perfect flange fit.

Monday, September 21, 2009

Bridge Cap Glue Up


One half inch thick quarter sawn hard rock maple is the material used for bridge caps. Because the cap and the bridge body are made from a very hard wood, it is very important that the joining surfaces mate perfectly. I use a combination of thickness planer, joiner, sanding block and scraper to achieve this perfect mating. It is a bit tedious, but it is possible. Once this is accomplished, the cap and body are joined with a special glue (Bolduc acoustic wood glue) and clamped with about 200 psi pressure. After drying overnight, the over hanging wood stock is removed with a spiral trimming router bit in my router table. The result is a tight joint, and nicely planed side, and a bridge that is ready to be planed to the proper height when setting the bearing.